Saturday, 12 May 2018

How to draw 3d horse face | Oil painting | Final Part - Dilip Art


ABOUT PICTURE


Hi friends I am Dilip Sarkar and here I have drawn a horse that is waiting for his owner. Here I have made this a 3D painting and you can obviously learn some tips from the painting. So I hope you will enjoy drawing this and impress others. So keep in touch with my website and enjoy some cool articles for learning more and more art tips. And this is a big painting so for your better learning I have made this article in two parts. In the first article I have showed that how to draw the window frame of the stable and now in this painting I will show you to draw the horse.


COLOR-Blue, Burnt Sienna, Yellow, Red and White.

CANVAS- ‘36’x’30’


HOW TO DRAW STEP BY STEP-OIL PAINTINGS


STEP 1: In the first step I have drawn a sketch of a horse that is little bigger from the frame as you can see in the picture. And you have to draw the horse very carefully and beautifully otherwise the picture will not look so realistic.


STEP 2: In the left side of the horse’s face I have used little bits of dark color and in the right side I have kept it light because the source of the light is coming from right side. For the dark areas I have used burnt sienna and yellow ocher and in the light areas in the right side I have used light yellow, chrome yellow and white.


STEP 3: In this step you have to be very careful about drawing because here I have showed how to color shade nose, mouth, eyes and ears. I have used burnt sienna and blue to color the dark areas of those parts like eye balls, nose etc. And for detailing like in the eyebrow, the hairs in ears, and ion the nose areas where light comes I have used white and chrome yellow.


STEP 4: Now for that white design in the middle of the face of horse I have used a white and blue base at first and then then added white to show the hairs there.

Then the mane of the horse, so for the horse’s mane I have used yellow and white and I drew it very carefully because this is the beauty of the horse.


Thanks for watching .

How to draw 3d horse face | Oil painting | Part 1


ABOUT PICTURE


Hi friends I am Dilip Sarkar and here I have drawn a horse that is waiting for his owner. Here I have made this a 3D painting and you can obviously learn some tips from the painting. So I hope you will enjoy drawing this and impress others. So keep in touch with my website and enjoy some cool articles for learning more and more art tips. And this is a big painting so for your better learning I have made this article in two parts. Here is the first part and the second you will get in the next article.


COLOR-Blue, Burnt Sienna, Yellow, Red and White.

CANVAS- ‘36’x’30’

HOW TO DRAW STEP BY STEP-OIL PAINTINGS

STEP 1: In the first step I have first drawn a sketch of window but here the window is not a normal home window, it is a window which is mostly got to see in the horse stable barns. Draw the outline of the window as I have drawn in this step (see picture) with a 10b pencil. And for a better frame use a measuring tape.


STEP 2: Now as we know most of the stable barns are made of wood so here I wanted to make a wall of wood fiber. For that I have mixed up burnt sienna yellow ocher white and as the wall of woods like this are made of wood pieces, so for showing the separation and designing I have used blue and burnt sienna. Then I had added some detailing of the wood for a realistic effect.


STEP 3: Then I have colored the window frame with Prussian blue and white. And I have used the color as the way the upper portion of the frame should be little darker for making the shadow of the shade of tin.


STEP 4: Now the inner part, as from outside we see inner part of any room is dark where some little light enters inside , as this is the day frame picture and in this types of stable there is no light inside in the day time. And for this dark effect I have used a mix-up of red blue and white. You can see the picture where I put the color. Now as some lighting enters you have to make awesome area sore darker as the rest of the area looks little lighted.


STEP 5: And coloring white in the shahs of the window I have added more detail for making it more realistic..


Thanks for watching .

Saturday, 28 April 2018

How to Draw a Car Easy Step by Step with soft pastels


About picture

Hi, I am Dilip Sarkar , today I have made an article for kids I mean very small kids who are just very beginner. This is a car drawing with very simple steps which any kids can draw easily. So I hope it will help you a lot. If there am a problem then comment me I will answer you there.


HOW TO DRAW STEP BY STEPS (CAR DRAWING-SOFT PASTEL)

STEP 1: in the step 1 make an outline of the car where you have to draw two geometrical shapes one in the upper and one in the lower as I did in the above picture. You can use a ruler for that.


STEP 2: A then I had made bumpers and the backlights in the sides of the lower part. Then I have drawn the wheels of the car. You can draw the wheels by using any small circular shaped thing like cello tape, bottle cap etc. And I made curved area on the top of the car as the upper head of the car.


STEP 3: Then I have drawn the doors and windows ( remember the left window is attached with the door). Use ruler for perfection. Check out the above picture for drawing. Then also make two small circles in the middle of the car’s wheels for showing tiers.


STEP 4: Then color the car with light blue or sky soft pastel color and blurry the color with finger gently. For the upper head I have used little deep color like violet, you can use deep blue. Use black soft pastel for the tiers of wheels. I have used a black marker on whole the outline of the drawing for obvious highlighting of the outline.


STEP 5: Then lastly I made two fingers sitting inside the car that we can see through the window. I made a boy sitting in the front handling steering. You can see the video for drawing the figures or you can take a prospective from the above picture. And in the back seat I have drawn a girl. You can color them as you want but don’t change the face color. And lastly I have drawn the looking mirror with black marker and a shadow below the car with black soft pastel.


Now your drawing is ready use a spray for stabilizing the color.


ADD MORE DETAIL IF YOU WANT.


THANKS FOR WATCHING.

THANKS FOR YOUR LOVE AND SUPPORT.

Sunday, 18 March 2018

How to Paint Water - A shark under the sea - With Dilip Art


ABOUT PICTURE

Hi, I am Dilip Sarkar , today I have drawn a painting of underwater where you can see shark and a man swimming under water. I have tried to make the article as simple as possible so that you can understand it in very simple steps. If you are a beginners obviously it’s little hard for you, you should have some knowledge and also some experience about oil painting. Still you can draw it with my simple steps given below. Her I have added an animation in the video for you to get interested in drawing apart from getting bored watching same kinds of video. So I hope you will like this. Thanks a lot.

HOW TO DRAW STEP BY STEP (OIL PAINTING)

STEP 1: AS I want to make an underground picture I have made a base of turquoise blue and white acrylic mixture and put it on all over the canvas. SO after it had been dried I have started putting color. So I have started putting color from the lower left corner as I have selected the light coming from upper right corner. So I put Prussian blue mixing with little white in the lower left corner. Remember that starting from the lower left corner it become lighter to upper right corner.

STEP 2: Now the second step is very important because you have to be careful about brushing and color mixing all that. Here you should have little experience about oil painting. So on the upper right color first I have put yellow ocher then light yellow then little white and same combination in the middle but diagonally. So in the upper right corners I have added little extra light according to middle as you can see because that’s the area from where exactly light is entering into the underwater. And in the middle its basically the reflection of light made at the inner waves of under water. So I blurred the color diagonally.

STEP 3: Then I have added more lights with white but this time I have added spatula because it is very good to use spatula it gives got shading effect for light.

STEP 4: After the previous step I have added little more shadows with turquoise blue mixing with very little Prussian blue below the lights in middle area and added some more lights in some places specially just on the shadows if needed. Then I have made a stark with white.

STEP 5: you can see the background is moving, it’s my new idea to make you more interested in drawing. So then I have detailed the shark with blue mixing with little white like eyes, the stripes on its skin etc. and also added shadows with white blue mix-up on the wings and upper body. This actually will show the both the color of the body and shark. (See the picture for better placement)

STEP 6: Then I have made a man in the water. See picture for better drawing.

Add more detail if needed.

THANKS FOR WATCHING.

how to paint Iceberg | glacier lake Iceland | oil painting tutorial


ABOUT PICTURE

Hi, I am Dilip sarkar, today I am here with a drawing of iceberg. Our environment is now in danger because of many causes. The main cause is our environment is being heated too much because of many reasons. For that reason ices from mountains are melting and coming down to ocean. But those icebergs look so beautiful sometime. So here I wanted to capture that beauty on my painting. And I have given some simple steps for you. I hope you all enjoy this.

Colours: Prussian blue, turquoise blue (acrylic), Cobalt blue, Cadmium Red and White.

Canvas: ‘24’x’18’.


HOW TO DRAW STEP BY STEP (OIL PAINTING)


STEP 1: For this painting the first step is very important because this color on the background is the main supporting color for this painting. It will be easy to draw in this background. The color I used is acrylic turquoise blue in the background. Only the background is acrylic color but the whole painting is with oil paint.


STEP 2: First I have drawn sketch of two icebergs then I have put color in the sky. For the sky I have used blue white as first cote and then added little bit of red to get the effect of dawn. Then I blurred it with a soft brush to get the softy effect in the sky.


STEP 3: Now it is very interesting that you will see after this step that your painting has already got a structure. Now to get the lake I have used Prussian blue outside the icebergs. (See picture for better color placement)


STEP 4: Now at your left side in the ice berg which is in the distance from the front iceberg I have used cobalt blue and white for shading some shadows in the iceberg. To have those ups and downs I have used more blue mixing white for deep shadows.


STEP 5: For the front iceberg I have used the same color, cobalt blue mixing with little white. But here you have to do it with more detailed way because it is in the front.


STEP 6: Now adding more blue and white mix-up in some places in the iceberg for more shadows I have started adding reflection in the lake. For the reflection I have used only white because the blue has been given already.


STEP 7: Now in the lake I have added some very little waves with white using spatula. You can use a thin brush but using spatula leads to perfection.

Now add more details as needed.


THANKS FOR WATCHING.

Friday, 9 March 2018

How to Paint Water | An Iceberg | Paint With Dilip Art


ABOUT PICTURE

Hi, I am Dilip Sarkar, here I am with a new video of floating iceberg on the ocean. This painting is a massage to people that now days ice are melting very fast and ices are decreasing in amount for that. So purposing this I have made this article. I have given some simple steps here and I hope you all love this and enjoy.

COLORS: BLUE, WHITE and TURQUOISE BLUE

CANVAS: ‘18x24’

HOW TO DRAW STEP BY STEP (OIL AND ACRYLIC PAINTING)

STEP 1: First I want to tell you that I have colored the canvas with blue and white acrylic color mixing because this painting, in its background and the four back ground, has the same color base which is light blue for the sky base and the ocean base.

STEP 2: In step 2 I have selected the light coming from the right side and shadow part in the left side. So to make the darker color in the left side I have used Prussian blue and for the right side I have mixed more white along with very little blue with that for light.

STEP 3: Now I have drawn a sketch of ice berg with white. You can see in the picture for the better shape. If you are advance then you can draw other shape.

STEP 4: we can see light falling in the ice berg makes a very beautiful effect itself and it takes lots of color combination in it. In the top we can see lighter next to that blue as shadow then again white for light. So for that I have put white-blue mix-up in the top and blurred the lower part with blue. Here the shading is very important and especially the technique of using brush should be taken care off. And in the left side which is the opposite side of light basically I have made shadow with Prussian blue. (See video for better knowing of the technique)

STEP 5: Then for the front iceberg I have used acrylic turquoise blue color. I have used this color as base of the berg so that I can use blue and white color later for the light and shadow effect.

STEP 6: Then after 15-20 min when the acrylic color of the front berg has dried I have then added blue in some places as shadow and then added white blue mix-up(less blue) in the top as light. Here blurring is very important. Blurring should be soft, not too much that the color goes away or not too light that nothing has blurred, It should be medium having a soft effect in it.

STEP 7: Then I added Prussian blue in the ocean part and blurred it. Then added little more Prussian blue in different places and then made floating ice with white. So basically the Prussian blue is indicating the shadow here because ice when floating has a shadow on water for the falling light.

STEP 8: Now as we know floating ice has a reflection on water. So for making it realistic when I have drawn the ices with white I have attached white and blue just below the ices dragging the brush vertically from the ices.

how to draw oil painting, realistic clouds step by step - With Dilip Art


ABOUT PICTURE

Hi I am Dilip Sarkar, today I am here with an interesting painting. Sometimes when we see a sunny day gets darker gradually because of the heavy clouds covering the sun but because the sun is so bright and it is being shown little bit so it gives a very beautiful light effect on the cloud. So I have made that painting and showed you in some simple steps below. I hope you all love this.


HOW TO DRAW STEP B Y STEP (OIL PAINTING)

TEP 1: First I have drawn the sketch of some expanding clouds here. I have made the canvas darker with burnt sienna and blue because light opens up in the dark base as I said in my other videos.

Now I have put color in the sky area outside the clouds with blue and white. Here you have to understand that the sky this is the time when some cloud covers the sun almost, so outside the clouds it looks darker than the usual time. In painting i have kept that part little because the light opens up more but not dark as night. I have used white as well according to the painting’s demand. First I used low white so that I can out more as needed.

STEP 2: Then I have given white on the clouds mixing with very little blue. But here you have to use the brush in a kind of blur way. Don’t go too deep here because you have to add more white for light and detailing.

STEP 3: Now I have added white at the sides of the clouds as we see this kinds of effect when clouds covers the sun but sun is so bright and the light is shown in the sides and also little bit inside the clouds as needed (see picture) and here you can see in the picture. That there I have made sun which is being shown a little bit from the back of the clouds. For the bright sun I have dragged the color there like drawing a star and it shows the brightness of the sun.

STEP 4: Then I have blurred the inside of the clouds then added more detailed light with a thin brush. Then I have added more light in the sides of the cloud with white.

STEP 5: Now I have added little darkness with blue with mixing with very little white inside the clouds. (See picture)

STEP 6: And at last in the lower part of the drawing I have made some more little clouds with white and blue (use less blue). Then I have drawn some banana tree with little blue, green, green in the top as it is the lighted part of the leaf and blue in the lower part of the trees because of the shadow part. And then added some lights with white in the leaves of the tree and added more detail like adding white in the sky, adding lights to clouds etc.

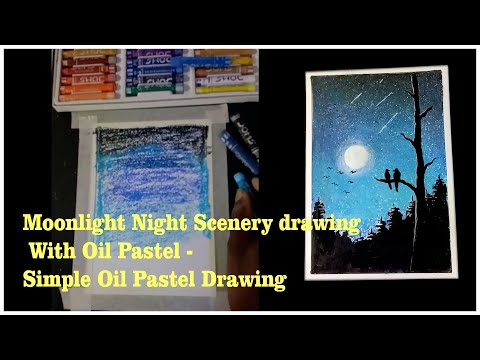
Moonlight Night Scenery drawing With Oil Pastel - Simple Oil Pastel Dra...

Moonlight Night Scenery drawing With Oil Pastel - Simple Oil Pastel Drawing | Dilip Art Hi friends I'm Dilip Sarkar I have tried to ma...